
Anúncios
A tent that is pitched well is quiet in the wind, dry in the rain and roomy inside.
A tent that is pitched badly flaps all night, sags onto your face and lets water creep in at the corners.
The difference comes down to a handful of habits you can learn in one afternoon.
Anúncios
Below is a reliable routine that works for most modern dome-style tents, followed by advice for wind, rain and difficult ground.
Always check your own tent's instructions as well, since designs vary.
Practice Before the Trip
Fast campers are not faster at the campsite; they practiced at home.
Pitch a new tent in your yard or a park before your first trip, following the instructions step by step.
Count the stakes, poles and guy lines, and note which parts go where.
Once you can pitch it comfortably, try again with a timer, then once more as if it were getting dark.
Pack the tent so the parts you need first come out first.
Many campers keep the stakes in their own small bag at the top of the tent sack,
so they never end up hunting for them in the grass.
While the tent is up at home, check the seams, zippers and fly coating.
If an older tent has leaked before, reseal the seams with a sealer made for tent fabric and let it cure fully before the trip.
Prepare Your Spot
Once you have chosen a flat, safe site, clear it of sticks, pinecones and stones,
which can poke through the floor or dig into your back.
Then decide which way the tent will face, weighing three factors:
- Wind: point the lowest, narrowest end of the tent into the wind, and keep the door on the sheltered side.
- Slope: plan to sleep with your head at the higher end if the ground is not perfectly level.
- Convenience: face the door toward your camp kitchen or the view, as long as the wind allows.
If you use a footprint or groundsheet, lay it down first. It should be slightly smaller than the tent floor.
Any edge that sticks out beyond the tent will catch rain and channel it underneath you, so fold or tuck it back.
The Step-by-Step Pitch
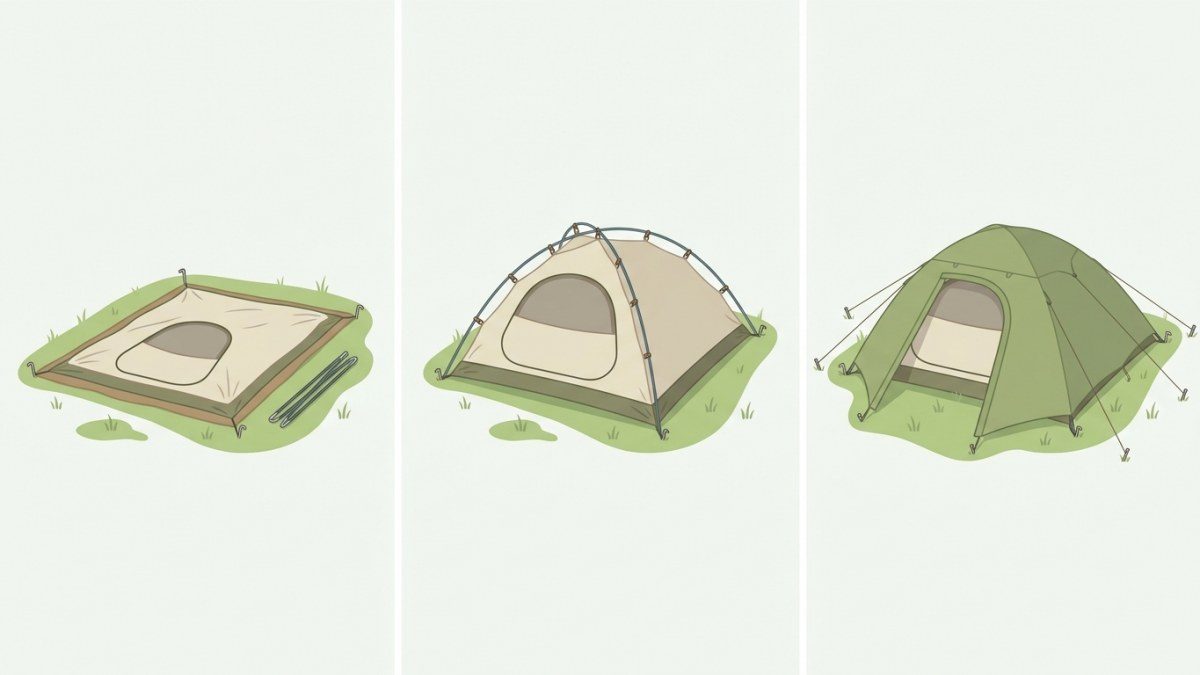
This sequence suits most freestanding double-wall tents, the kind with an inner body and a separate rainfly:
- Spread out the tent body on the footprint with the door where you want it.
- Stake the upwind corners if there is any breeze, so the tent cannot blow away while you work.
- Assemble the poles by seating each shock-corded section fully into the next, instead of letting them snap together, which can chip the ends.
- Attach the poles by setting the tips into the corner grommets or pockets, then clipping the body to the poles or pushing the poles through the sleeves. Push rather than pull, since pulling separates the sections inside the sleeve.
- Raise and square the tent so the floor is flat and the corners form clean angles.
- Stake the remaining corners, pulling the floor snug but not drum tight.
- Add the rainfly, stake and tension it, and finally set the guy lines.
Staking and Guying for a Tight Pitch
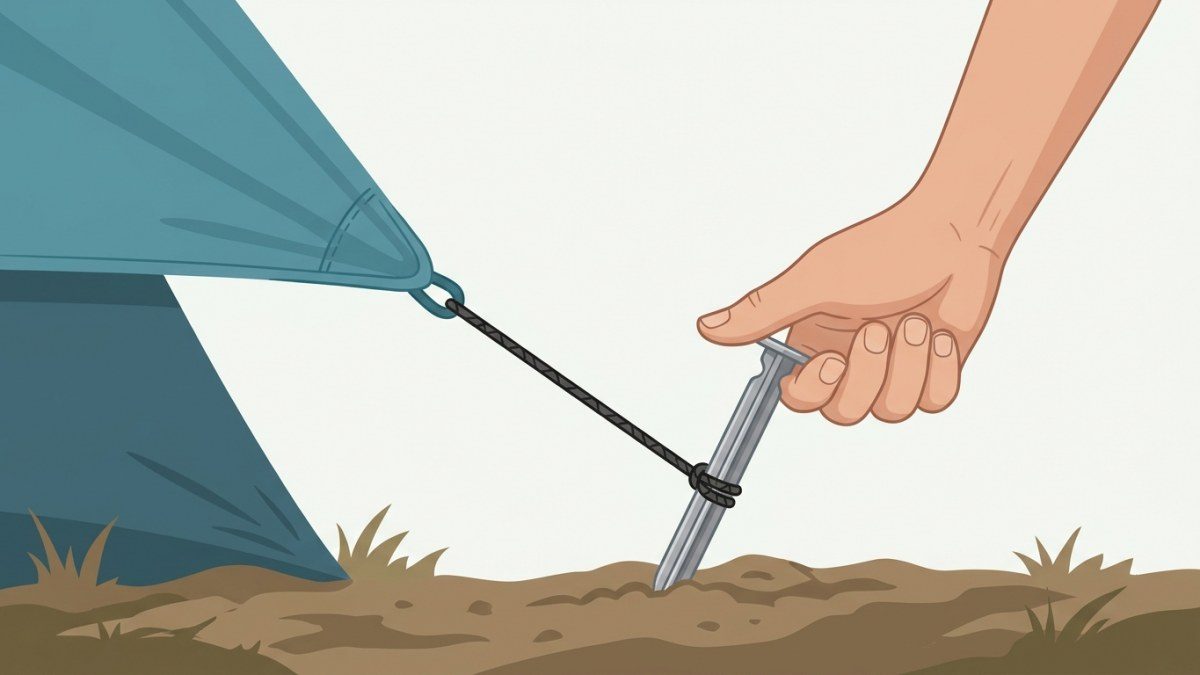
Stakes hold best when driven at about a 45-degree angle,
with the top of the stake leaning away from the tent so the pull of the line locks it into the ground.
Push them in by hand or with your foot when you can.
In hard soil, tap them with a flat rock or small mallet rather than stomping on the head, which bends light stakes.
Guy lines are not optional extras.
They hold the fly away from the inner tent, steady the poles in wind and help rain run off.
Stake each line out in line with the seam or pole it attaches to,
then snug the tensioner until the fabric is smooth but not straining.
When the Ground Fights Back
On rocky ground where stakes will not go in, tie lines around large rocks or pile rocks over a stake laid flat.
In soft sand or loose soil, bury a stake, a stick or a stuff sack filled with sand horizontally,
with the line tied around its middle. This buried anchor, often called a deadman, holds surprisingly well.
Get the Rainfly Right
Most flies have color-coded corners or buckles that match the tent body, and the fly door should line up with the tent door.
Once it is attached, tension the corners evenly so the fabric is smooth, with no sagging panels.
The fly must not touch the inner tent anywhere, because contact lets condensation and rain soak through.
Open the fly vents to let moist air escape, then check the tension again after sunset or during a rainy evening.
Many fly fabrics, especially nylon, relax and sag as they cool and absorb moisture, and a quick tug on each tensioner restores a tight pitch.
Pitching in Wind or Rain
In strong wind, keep the tent low and anchored at every stage. Stake the windward side first,
keep a hand or knee on the fabric as you work and attach the poles before you let the tent rise.
With a partner, one person holds while the other clips and stakes.
Tuck stuff sacks into a pocket right away so they do not blow off.
In rain, speed and sequence matter most. If your tent allows the fly and poles to go up first,
pitch that way and clip the inner tent in once you are under cover.
Otherwise, lay out every part in order in your car or under a tarp,
pitch quickly and get the fly on as soon as the poles are attached. Keep a small towel handy to wipe drips from the floor.
Common Mistakes to Avoid
- Leaving the footprint sticking out past the tent floor
- Putting the fly on inside out or rotated, so the doors do not line up
- Skipping guy lines on a calm evening, then scrambling when the wind picks up at night
- Over-tightening the floor or fly, which strains seams, zippers and poles
- Staking the floor with the doors unzipped, which can leave the zippers too tight to close later
- Storing stakes loose in the tent bag, where they can tear the fabric
Taking It Down the Right Way
Breaking camp carefully protects the tent for next time.
Shake out dirt and debris, and if the fly is wet with dew,
give it time to dry in the morning sun or wipe it down with a towel.
Remove the fly first, then unclip the body and ease the poles out.
Fold poles starting from the middle sections so the shock cord wears evenly.
Pull stakes by their heads or with a hooked stake puller rather than yanking on the tent loops,
which can tear the fabric, and count them before you leave the site.
Pack a damp fly separately so the inner tent stays dry, and set everything up to dry within a day of getting home.
Practice Makes It Automatic
A good pitch is a routine: prepare the ground, stake smart, tension the fly and use your guy lines every time.
After a few trips, you will set up in minutes and spend the evening enjoying camp instead of wrestling with fabric.
Before each season, pitch the tent once at home to catch missing parts or worn cords early.
Sources and Further Reading
This article was reviewed by the BraverPlay editorial team against the official sources below. Rules, conditions and gear vary from place to place, so always check the latest guidance from local authorities before you head out.
- Tents and tarps (Learn-to Camp), Parks Canada: Practice pitching at home, clear the spot, use a groundsheet, attach poles, peg at a 45-degree angle and line the fly up with the door.
- Finding and Setting Up a Campsite, U.S. National Park Service: Clear sticks and rocks, avoid low spots, sleep head uphill and fold any excess groundcloth under the tent so it does not collect rain.
- Camping Safely Step 1 - Before the Trip, U.S. National Park Service: Test your equipment before the trip, and try a backyard campout if you have never camped before.